 This project is based on the Raspberry Pi Foundation All Seeing Pi Photobooth project. I wanted to add in the ability to print the photos to a small Bluetooth printer and to email them instead of tweeting them. I also added in the ability to control the Photobooth with a Wii remote. The Wii remote is useful when people want to stand back further from the Photobooth to take a picture.
For the printer I choose to go with an HP Sprocket Printer. This little printer was light, portable and ink-less. The photo is also a sticker, which added to the fun of the Photobooth. While the HP printer normally uses an app on the phone to send pictures to it, it can communicate over Bluetooth with the Raspberry Pi.
The code I tweaked/forked from the All Seeing Pi Photobooth is on my github. The Raspberry Pi foundation does a great job walking through the code and explaining everything. If you want a firm understanding of how the code works I suggest you walk through their tutorial. In general, the changes/additions I made to the code were:
1) Added in the ability to print the photo
2) Added in the ability to email the photo
3) Added in support for the Wii Remote which includes the ability to go to the previous/next overlay, remove the overlays, take a picture and start a new picture
4) Added in some sound effects
5) Added in some graphics to the GUI
6) Added in some additional filters to overlay on the picture (note googly eyes on the dog below)
7) Uses a kill button to stop the Photobooth since it runs full screen

Materials I used
8.5" x 12" x 4" Wooden Box from Michael'sButtons
Landzo 7" Touchscreen
PiCamera
Speaker (Optional, nice for camera sound effects)
Optional Button (used to kill the fullscreen Photobooth program)
HP Sprocket Printer (other Bluetooth printers may work, but I haven't tested them)
Chalkboard Paint
Raspberry Pi 3
Original Wii Remote (NOT THE WII PLUS OR THIRD PARTY REMOTES-IT MAY NOT WORK)
3D Printed Parts
Landzo Touchscreen CaseSimple Pi Camera Mount
Tripod Mount
Build the Case
For my case I used a 8.5" x 12" x 4" wooden box from Michael's. It was just the right size to mount the 7" Screen with some room to spare for the buttons and the Raspberry Pi Camera. I designed and printed a case to hold the 7" touch screen and a little mount for the camera. In order to mount the box on a tri-pod, I printed out this tripod mount and fastened it to the bottom. I also cut a hole in the back so I could access all the parts. Alternatively, you could put the lid for the box in the back and simply cut a little hole for the power to go out. After making all the holes in the box for the screen, buttons and camera I painted the box with black chalkboard paint. I decided to use chalkboard paint so I could change the design depending on the event.
 |
| Front with Pi Camera Mount |

Attach the Buttons
For this project, I decided to use three buttons. Two buttons are mounted on the front. One cycles through the overlays/picture effects, and the second will take a picture. I attached the Overlay Button to GPIO 23 and the Print Button to GPIO 11. The buttons I chose light up, so each button is also connected to a 5V and Ground Pin. You could also just use a plain style arcade button and forgo the lighting.I also placed a small reset button in the back and attached it to GPIO 13. This button will kill the Photobooth application since it launches in full screen mode. If you want to hear the sound effects, you can connect a small speaker to the audio jack in the Pi. I love this little speaker I ordered from Amazon. The charge seems to last a long time and does not need any external power to run.

Load the Libraries and Dependencies
My touchscreen came with an Raspbian image pre-configured for the touchscreen, however, any recent version of Raspbian should work. There are several libraries and packages that will need to be installed to get everything working. After running sudo apt-get update, run the following commands to get everything installed:sudo apt-get install python-imaging-tk
sudo apt-get install python-cwiid
The above commands will add in support for Tkinter (the GUI) and the Wii Remote. Next, the following libraries are needed to support the Bluetooth printing:
sudo apt-get install python-pip python-dev ipython
sudo apt-get install bluetooth libbluetooth-dev
sudo pip install pybluez
sudo apt-get install obexftp
Connect and Test the HP Printer
Now that all the dependencies have been installed, let's connect and test the printer. Turn the printer on and use the Bluetooth Icon to connect to the printer. If you hover over the device, you will see the MAC address in the dialog box. Write this down as it will be needed later:
After connecting, you may receive an error similar to the following. It's safe to ignore it. Mine seems to work fine regardless:

Now that is has been paired, test the printer to make sure you can send a picture to it. I just took a screenshot of my desktop for a test image to send. Open up a terminal and type in the following (make sure and put in your own MAC address)
obexftp --nopath --noconn --uuid none --bluetooth C4:30:00:00:7E:41 --channel 4 -p screenshot.png

If you have any issues, check out this detailed post by Matt Richardson, which is where I was able to get this all figured out. If you install the HP Sprocket app on your phone, you can adjust some settings in the printer. By default, the printer turns off after 5 minutes or so. I turned this off so mine remained on the whole time. I also added a strip of Velcro to the underside of the printer to secure it to the top of the box.
Get the Pi-Photobooth scripts
Make sure you are in the directory /home/pi and clone the repository for Pi-Photobooth:git clone https://github.com/mdegrazia/Pi-Photobooth
There are four python scripts for the Photobooth program. The main one is photobooth.py. This one runs the Photobooth application and prints the pictures etc. When it launches, it will start up the photobooth_wii.py script as a separate process. The photobooth_wii script is responsible for connecting to the Wii remote. Once connected, it will monitor the buttons pressed and report back to the main script. The third script, overlay_functions.py is used by the photobooth.py script. It contains functions related to the picture overlays. The fourth script, monitor_gpio_buttons.py kills the photbooth application when the button in back is pressed.
After the code has downloaded, a couple of lines need to be edited in the photobooth.py file to customize it for your printer and email settings.
nano /home/pi/Pi-Photobooth/photobooth.py
Find the lines at the top of the code under "CHANGE ME", and put in the MAC Address from the printer, your gmail account username and password, and what you would like your email subject line to contain. (The code is currently written to support gmail. You may have to adjust the security settings on your gmail account to send emails from an application)

The monitor_gpio_buttons.py script needs to start automatically. As mentioned before, this will be responsible for shutting down the Photobooth application when the button on back is pressed. I found this useful because there is no way to exit the Photobooth application when it's running. To get it to start automatically, edit the crontab file:
sudo crontab -e
@reboot sudo python /home/pi/Pi-Photobooth/monitor_gpio_buttons.py &

After rebooting, start the photobooth.py script through the terminal (dont use ssh, it must be done via the touchscreen)
sudo python /home/pi/Pi-Photobooth/photobooth.py
If all goes well, Photobooth should launch. A sound effect of will play, meaning that it is looking for a Wii remote. Note - you don't have to use a remote with this, it will work just fine without one too. Push the 1 and 2 buttons simultaneously to sync the Wii remote. Once it's been paired a confirmation message will play and the Wii remote will vibrate.
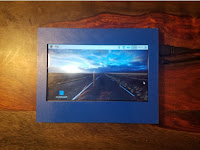
When the application starts, all the buttons will fire. If necessary, just hit the "New Picture" button to reset everything. Note- the image preview is a GIF, so it will may be a little pixelated. The image that prints out or is emailed will be a full sized png file with better resolution.
Below are how the buttons are configured on the Wii remote:

Note: Do not use a Wii remote Plus, only the original Wii remote
Finishing Touches
While not necessary, the following are some additional things that can be done.Add a shortcut on the desktop to start up the Photobooth. To do this, create the file /home/pi/Desktop/photobooth.desktop with the following contents:
[Desktop Entry]
Version=1.0
Name=PhotoBooth
Comment=PhotoBooth
Exec=sudo python /home/pi/Pi-Photobooth/photobooth.py
Icon=/home/pi/Pi-Photobooth/images/photo-booth.png
Path=/home/pi/
Terminal=false
Type=Application
Categories=Utility;Application;
Customize the touch keyboard to include the '@' symbol to facilitate adding in email addresses. I have a matchbox xml config file included in the repository. Copy the keyboard.xml file provided to the root user profile:
sudo mkdir /root/.matchbox
sudo cp /home/pi/Pi-Photobooth/images/keyboard.xml /root/.matchbox/keyboard.xml

Change the desktop background to a more Photoboothy one. Right click the Desktop, Desktop Preferences, then under Wallpaper browse to /home/pi/Ri-Photobooth/images/photo_booth_background.jpg

You may also want to turn off the screen-saver to keep the screen from turning off.
That's it! For additional fun, check out some of the photobooth props you can buy online or make some yourself.
Great project!!!
ReplyDelete
ReplyDeleteGreat post i really appreciate this post it seems that there's a lot of interesting on this site i will bookmark your page for more new updates on your site. keep it up.Visit: Bluetooth Printers
Hey!
ReplyDeleteI have this code to the bread board stage and it is great. I have never worked with python before, so there was much to learn. My kid plays water polo and I wanted a photo booth that I could take to her tournaments for her team to use. I have change the overlays to the logos of the tournaments and teams, they can toggle thru the crests, the team logo or no overlay. I am using a poloroid zip printer which works fine with the instructions provided. I do have to move the overlay out of the corner (0,0) to about (40,40) because of the printer crop. I also added a count down with a simple annotate.text and sleep code with large text and offset(' 3', ' 2') to avoid the logos in the upper left. I am going to add a solar panel, battery pack and cell phone for connectivity so any pool will be an photo set!!!
I really appreciate the code and look forward to using it this summer as the polo season heats up.
Thank your for your effort.
k.
Thanks for the feedback! Love the idea of the solar panel.. it will help reduce the power cords and make it much more portable!
ReplyDeleteFinished with the carpentry. Looks great. Really like the chalkboard paint. Ended up with a 26000 mAmp battery with 3 usb ports to run the pi, printer and wifi hotspot. The solar panel will charge the battery for extended use. I'll get a monthly cellular plan when it gets closer to summer. If I knew how to upload a picture, I'd share. Overall a great success, thank you so much.
DeleteThat is so cool! Can you tweet a picture? @maridegrazia
DeleteI am trying to build this but I ran into a problem. I got everything running but when I run the program the camera isn't in the right spot. It is big and covers the button. Is there a way to make it smaller?
ReplyDeleteHmm... Have you tried changing the resolution on the touch screen?
ReplyDeleteMy resolution is at 800x480. Is that what it's suppose to be at?
DeleteWedding photo Booth Services NJ
ReplyDeletenice blog... thanks for sharing....
ReplyDeleteamazon alexa customer service
If you are looking for Photo Booth Rental Los Angeles, then Photo Booth Rent LA a great choice for any party, event or wedding day. It's always fun and remembered, so don't miss the opportunity to create a lasting impression with friends & family on your special day.
ReplyDeleteHello. thank you for this great tutorial. I have the project to use this facility for my wedding. I would like to know if it’s possible to add a timer before taking a picture. I am a beginner in Python and I have not arrived. thank you in advance.
ReplyDeleteUse time.sleep(1) the 1 is for 1 secondes.
DeleteHi, thank you for this tutorial. I'm building one for my wedding.
ReplyDeleteI have an issue with the virtual keyboard. When the adress email is asked the keyboard doesn't appear.
Do I have to install the virtual on raspbian ?
This is awesome. Thanks for sharing. Question: Are you using GPIO numbers or pin numbers?
ReplyDeleteAnswered my own question, such a newbie.... GPIO.BCM is GPIO numbers
DeleteSuch a very useful article. Very interesting to read this article.I would like to thank you for the efforts you had made for writing this awesome article. printer cartridge
ReplyDeleteHello! Very good job with this Photobooth.
ReplyDeleteI did'it and work just fine. Next I must make the box.
For print on larger format (post card) is possible to conect a usb printer with cups?
Thank You
Your blog is always awaited, because good information is available from your blog, thank you....
ReplyDeleteepson printer support
epson printer support phone number
Australian Photo Booth - In The Booth is a photo booth hire company that provides photo booth services in various locations across Australia. For More Information Visit Here -- https://strikingpose.com.au/2018/04/26/enjoy-and-smile
ReplyDeleteSuperb blog! Very attractive. The amusing announcements about windows from larch timber. Follow here. https://building.ucoz.ru/
ReplyDeleteDiamond Beauty salon offers Lebel coloring
ReplyDeleteДоброе утро! Обращаем ваше внимание на справочник современных медикментозных средств. В справочное издание включены сведения об около 700 выпускаемых лекарственных препаратах, выпускаемых российскими и зарубежными фармкомпаниями. О любом лекарственном средстве дана исчерпывающая инфа: состав и форма выпуска, лечебные характеристики, показания к использованию, правила применения, взаимодействие с алкоголем, вероятные побочные эффекты, противопоказания и взаимодействие остальными медикаментами, также вероятность назначения при беременности, грудном вскармливании. В справочник введен тематический указатель, в каком имеется информация о том, какое медикаментозное средство нужно использовать при тех или иных заболеваниях, состояниях, синдромах. Путеводитель можно прочитать на специализированном сайте. Если не поможет, обратитесь к доктору.
ReplyDeleteПараллельно-раздвижные окна и двери, иначе называемые PSK-порталом, подбираются в целях сохранения свободного, незаполненного места. Стандартные типы окон и дверей раскрываются внутрь помещения, что занимает весьма большую область места в помещении. Технологичные оконные конструкции позволяют избегнуть этой неприятности, усилить световой и воздушный поток в помещении.
ReplyDeleteНаклонно-сдвижной портал являются системами, которые владеют обширной площадью остекления. Для сдвига створок монтируются нижние и верхние полозья, благодаря которым створка бесшумно и легко движется.
Раздвигание осуществляется с помощью ходовых роликов, которые имеют в своем составе опору как компонент армирования, дающим возможность очень равномерно распределять вес по по всей раме. Они дают возможность стеклопакету передвигаться в различных режимах (наклона, сдвига).
Высота створки окна может достигать 2,36 метра, а ширина створки окна будет меняться от 67 см до 1600 мм. С учетом суммарного веса (изменяется от 100 кг до 200 кг), на портальную систему устанавливается специальная фурнитура для обеспечения надежного открывания - закрывания створок, увеличения срока правильной работы. Ширина свободного проема имеет возможность достичь 2000 мм.
Портальные двери и окна могут похвастаться хорошими герметичными характеристиками, высокими показателями звуко-, термоизоляции, предлагают существенный уровень противовзломности, прекрасно подойдут для всех типов современных профилей. При сборке используют опоясывающие щеточные уплотнители, которые заметно улучшают функционирование створок.
В том случае вам хочется оформить лоджию, большой загородный дом, городскую квартиру или балкон согласно модным тенденциям в дизайне, то компания-изготовитель СВ Окна изготовит и сделает монтаж параллельно-раздвижных окон и дверей.
Очень немногие фирмы-изготовители косметических препаратов могли бы похвалиться тем, что их товар попал в разряд фаворитов, предпочитаемых членами царствующих семейств. Компания-производитель Lebel Cosmetics уже свыше 30 лет поставляет собственную продукцию в японский императорский дом. Логично, что, заслужив титул косметики №1 в Японии, средства для фитоламинирования волос Лебел в салоне легко захватила рынок Европы и уже покорила сердца многих девушек США и Канады.
ReplyDeleteIf you need to hire a reliable hacker to monitor your spouse’s phone or social network, contact expressfoundations@gmail.com
ReplyDeleteIt’s extremely confidential